Thursday, July 27, 2006

A Madness of Mangos (part 3)

Shrimp & Mango Cocktail
This recipe is adapted from “Best of Salads and Buffets” a 1983 paper back printed by HP Books
Serves 4


  • 2 mangoes
  • 1 red bell pepper
  • 1 pound small to medium shrimp
  • 3 tablespoons mayonnaise
  • 1/3 cup dairy sour cream
  • 1 teaspoon sugar
  • 1 teaspoon lemon juice
  • Few pickled green peppercorns or freshly ground black pepper
  • 1 tablespoon grated fresh horseradish or prepared creamed
  • horseradish
  • Few mint leaves, if desired

    Cut each mango in half lengthwise. Remove seeds; discard. Scoop out flesh to within 1/4 inch of shells; finely dice flesh. (1) Cut bell pepper in half; place under broiler until skin breaks. Peel off skin and remove seeds. Slice pepper in thin strips. Peel raw shrimp and cook in boiling water seasoned with “Old Bay Seasoning” for one minute. Drain but do not rinse, chill in refrigerator. In a small bowl blend together mayonnaise, diced mango, sour cream, sugar lemon juice, green peppercorns (2) or black pepper, horseradish (3) and shrimp (4). Spoon mixture into mango halves. Top with strips of red pepper. Garnish with mint leaves, if desired.

    Cooks notes; (1) I had a tough time getting the pit out and useable chunks of mango for the salad. I resolved this by cutting up an extra mango or two cutting the meat from the pit then dicing it for the salad. I reserved the flesh scraped with a spoon from the shell for a smoothie. (2) can be omitted. (3) The horse radish is somewhat germanic in taste albeit an interesting combination, you may prefer to keep this more latin in flavour and a pinch of ground red pepper or some cut up jalapeño could do nicely. (4) It may not be necessary to add all of the mango chunks or the shrimp, keep adding and tossing untll all is nicely coated in the dressing. One thing for sure, if your a shrimp lover you are going to love this!
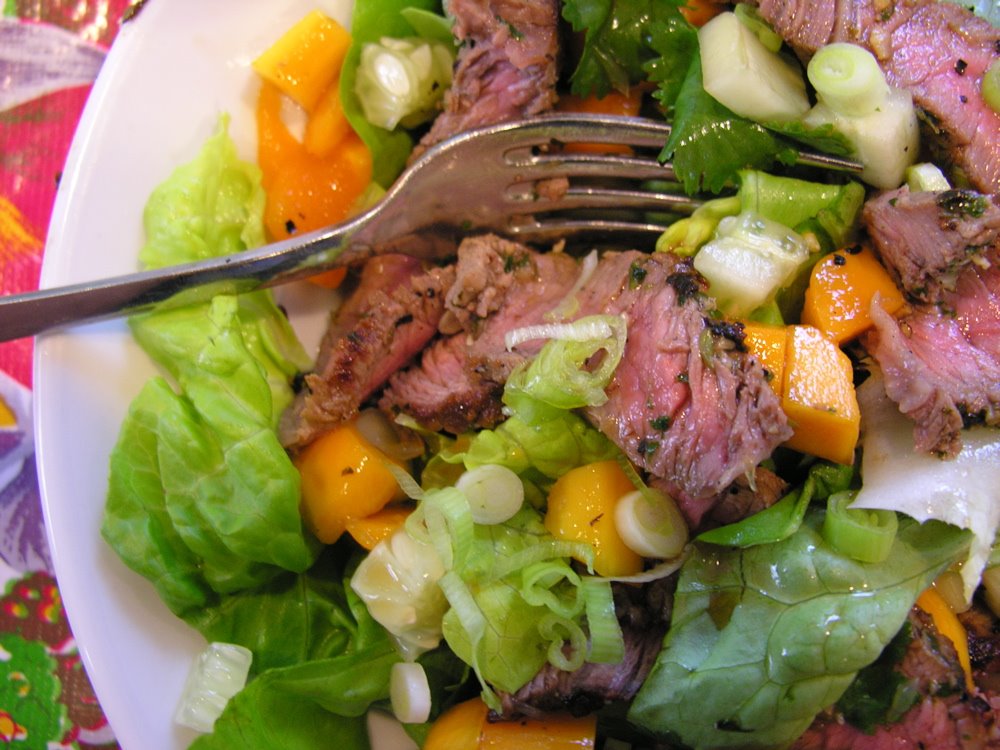
    Thai Steak and Mango Salad
    Adapted from “The Great Mango Book” by Allen Susser
    Serves 4


  • 3 cloves garlic, minced
  • 10 sprigs cilantro, stemmed (reserve stems)
  • 1 teaspoon kosher salt
  • 1/2 teaspoon freshly ground black pepper
  • 3 tablespoons peanut oil (canola oil works as well)
  • 12 ounces sirloin steak, trimmed of fat
  • Inner leaves from 1 small Bibb lettuce, washed and dried
  • 1 small, firm, ripe mango, peeled, cut from the pit, (any sweet “firm” mango will do, add as much as you like)
  • cucumber, peeled, seeded, and diced
  • 4 large green onions, including light green parts, diced

    dressing
  • 2 tablespoons Thai fish sauce (also know as nuoc mam, our favorite is Golden Boy Brand)
  • 2 tablespoons freshly squeezed lime juice
  • 1 tablespoon soy sauce
  • 2 teaspoons minced, fresh red Thai or jalapeno chili
  • 2 teaspoons packed brown sugar

    In a food processor, combine the garlic, cilantro stems, salt, pepper, and 2 tablespoons of the oil. Pulse to make a smooth paste. Spread the paste on both sides of the steak. In a large, heavy skillet, cook the steak 3 to 4 minutes on each side for medium rare. Remove from the pan and let cool. Cut the steak into thin strips.
    Divide the lettuce leave: long 4 plates and arrange the mango, cucumber, green onions, and strips of steak on top. make the dressing: In a small bowl, combine all the ingredients and stir until the sugar is dissolved.
    To serve, drizzle the salad with the dressing and scatter the served cilantro leaves over the top.

    Cooks note: The Author states that texture plays a predominate role between the crisp green mango and the tender sirloin steak. I find that a frim ripe “green” mango is usually on the tart side, indeed it is crunchy but the real play in this salad is with a firm sweet mango thats toys in your moth when it hits the salty fish sauce. I do love the way the author uses the cilantro stems, now that is a idea that made me sit up and think.

    Mango Vinaigrette
    Adapted from “The Great Mango Book” by Allen Susser
    Makes 3 cups


  • 1 medium ripe mango, peeled and cut from the pit
  • 2 tablespoons minced fresh ginger
  • 2 tablespoons freshly squeezed lime juice
  • 1/4 cup rice vinegar (I prefer white wine vinegar)
  • 1 small red bell pepper, seeded, deribbed, and diced
  • 1 small red Thai chile, seeded and minced (can be omitted or use jalapeño chili)
  • 1/4 cup minced fresh cilantro
  • 1/4 cup canola oil
  • 2 teaspoons kosher salt
  • 1 teaspoon freshly ground black pepper

    Cut one half of the mango into 1/4-inch dice. Chop the other half and remaining flesh coarsely. In a food processor, combine the chopped mango, ginger, lime juice, and vinegar. Process until smooth.
    In a large bowl, combine the mango puree, bell pepper, chile, and cilantro. Gradually whisk in the oil to make an emulsified sauce. Stir in the salt, pepper, anddiced mango. The vinaigrette will keep, covered and refrigerated, for 2 to 3 days.

    Cooks notes: As the author “Allen Susser” states this is a refreshing dressing for a summer salad. We composed our salad by sauteing some bay scallops, toasting some pine nuts, crumbling up some fete cheese and diceing up an extra mango. All nicely arranged and top with the vinaigrette. Other salads using grilled shrimp or chicken would be well served with this vinaigrette.
  • Wednesday, July 12, 2006

    Fava Follow Up

    I have decided to post a no recipe follow up to our previous post “The Transcendent Fava.”

    My fervour for beans lead me to review the story of “Jack and the Bean Stalk”, I had forgotten about the voracious appetite the giant had, and I learned that the version I was familiar with was the tamed down “no nightmares” childhood one. To refresh your vision of “Jack and the Bean Stalk” and to make for some lively dinner conversation visit D.L. Ashliman’s folk texts . If you have read this far, you are on your way to becoming a fava bean aficionado, congratulations, read on. No discussion on fava bean is complete without a mention of the movie “Silence of the Lambs” and the famous line spoken by the character Hannibal Lector, “I ate his liver with some fava beans and a nice Chianti.” Some of you may want a tee shirt depicting Hannibal and his love for favas..
    Bon appetito!
    Related Tags: , ,

    Sunday, July 09, 2006

    The Transcendent Fava Bean

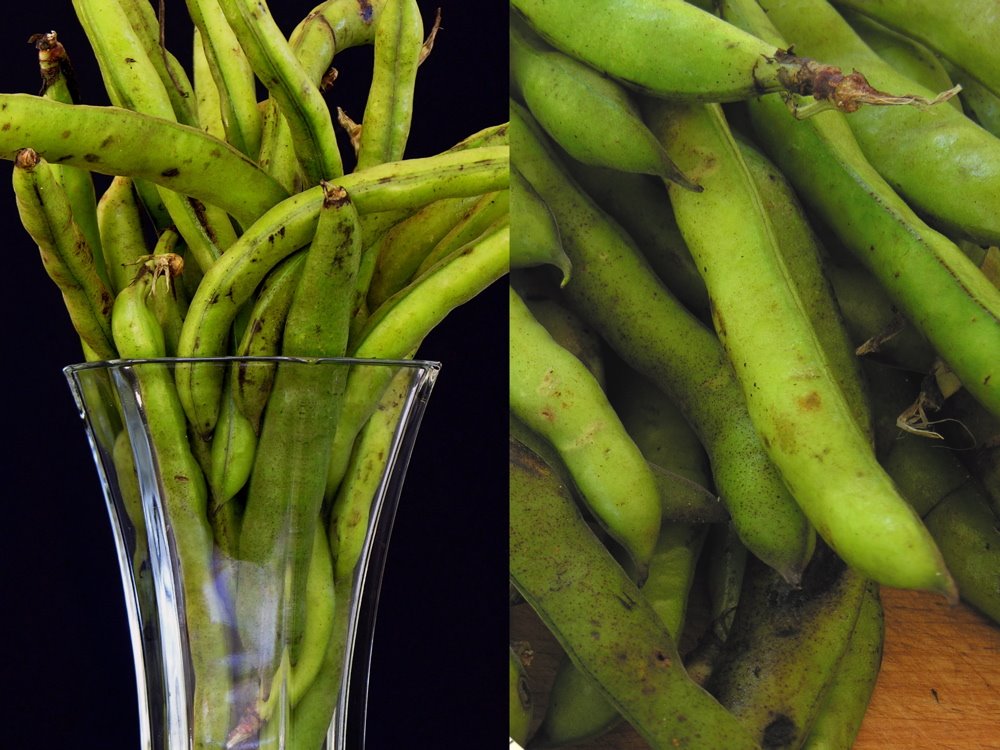
    If Jack from the tale “Jack and the Bean Stalk” had not traded the family cow for a few beans his life would have remained impoverished. No sack of gold, no hen to lay the golden eggs, no gold singing harp and finally no marriage to a great princess. Beans provide for some nice perks and that is what I hope to convince you of. For me the “Queen Bean” is the Fava, so much so when I see fresh Favas I get excited enough to make proclamations to the produce staff at our local Publix market. I admit to having said “These beans are like eating poetry”, “Favas make a dish fit for kings and beggars alike”, “ A mouthful will stop time.” With wide eyes and speechless lips they eye the unfamiliar bean not knowing what to say in reply. I load my cart with the large green lumpy pods, priced at $1.99 a pound and feel as if I have just won the lottery. So if you want to live happily ever after read on.

    Some Basic Facts;
    Fava beans have been on the menu for 9000 years, first appearing during Neolithic times in the Middle East. Fava beans are well travelled and now appear world wide except in the lowland tropics. It is important to note that a small minority of people in certain populations (usually of Mediterranean extraction) have a negative reaction to favas known as “favism”, on the other side of the coin favas are being studied as a way to control the symptoms of “ Parkinson's Disease”. There is much information to be found on the internet, the “Long History of the Mysterious Fava Bean”is a good place to start. Some years ago I purchased “A Gardeners Guide To Fava Beans” by Ianto Evans. A little pamphlet publication published by a group know as the “Fava bean project” is a good reference. It includes some recipes and information on how to grow favas. It may be helpful if you can find it, I have not been able to locate a source.

    Initial Preparation;
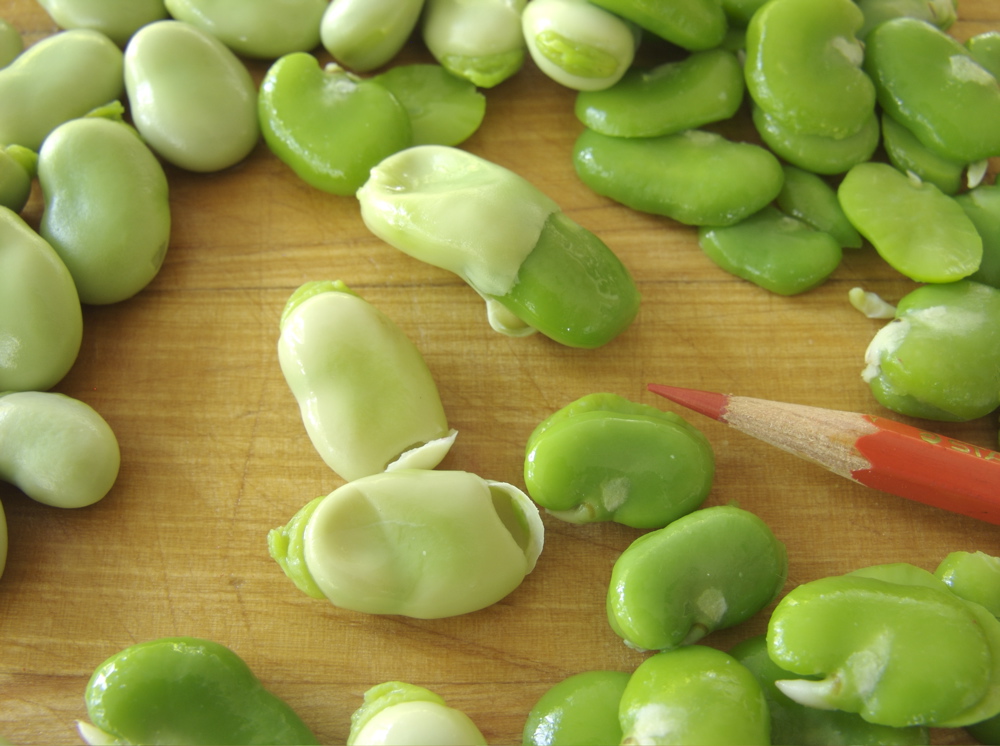
    Fava beans come both fresh and dried and the month of June is the time to find the fresh ones. The season for fresh favas is early spring to early summer, I most recently had them on the Fourth of July. Preparation for fresh favas is a two step process. Like English Peas they need to be shelled, if you are not dealing with a bushel this is relaxing to do. Once out of the pod the beans should be blanched in boiling water for one minute to loosen the skin around the bean, then drained and cooled in an ice bath. The outer husk can be removed by pinching the edible bean out of the husk, for me this involves making a small cut with my thumb nail then squeezing out the bean using thumb and fore finger. The beans are so beautiful the process becomes zen meditation, something to be enjoyed.

    Pinching and squeezing the bean.

    Fresh Favas Sautéed in Olive Oil with Garlic
    Not much to explain here. Use a good oil with flavor, fruity or spicy, a clove of garlic, more for garlic lovers. Slowly sauté the beans for 10 to 15 minutes stirring often. Season with salt to taste and add a squeeze of lemon juice if desired. For a slightly different flavor add either a small quaintly of minced pancetta or prosciutto along with the garlic and olive oil.

    Favas with Pasta
    The recipe comes with some adaptation from the pages
    of “The magazine of La Cucina Italiana” May-June 2006.

  • 2 tablespoons butter
  • 2 garlic cloves, thinly sliced
  • 12 ounces fresh fava beans, prepared (more is better!)
  • 2 tablespoons pine nuts, lightly toasted in a fry pan
  • 1 1/2 cups mache (also known as lambs lettuce) washed and drained. In my opinion chopped escarole would be a good substitute.
  • freshly ground pepper

    The magazine gives directions for making a hand made fresh pasta called “Trofie” little twists of pasta. If making your own pasta is something you have time for it will improve the texture and flavor of this dish. My personal preference for this dish is to keep the pasta delicate, whether fresh or dried. We used a pasta made by the Alessi company, called “Casarecci.”

    Start your pasta water, once boiling add salt and dried pasta. In a skillet (large enough to accommodate the pasta) melt the butter add the garlic and sauté until golden, add the favas and the pine nuts and sauté for 3 to 5 minutes. (if using fresh pasta cook after sauce is made) Drain pasta add to the skillet with the mache, cook until the lettuce is wilted about 1 minute.

    *Cooks note; I like to add additional butter along with a tablespoon or two of pasta water making the sauce looser and richer. Season with salt and pepper, toss well, pass Parmigiano-Reggiano at the table.

    Risotto with Fava Beans and Fennel
    Risotto con fave e finocchio

    Recipe adapted from “A Fresh Taste of Italy” by Michele Scicolone. *I highly recommend this book, with more than 250 recipes it covers the basics to specialities, clearly written and accessible to any one who has just a spark of interest in Italian cuisine.

  • 1 1/2 pounds fresh fava beans, or 1 1/2 cups frozen fava beans, blanched and peeled.
  • 1 large fennel bulb (1 pound)
  • 2 tablespoons salted butter
  • 2 tablespoons olive oil
  • 1/4 cup finely chopped green onions
  • 2 cups medium-grain rice such as Arborio, Carnaroli, or Vialone nano
  • 6 cups hot home-made chicken broth or a combination of half canned broth and half water
  • salt and freshly ground pepper, to taste
  • 3/4 cup freshly grated Parmigiano-Reggiano.

    Shell the fava beans then peel off the thin skin that covers each bean. You should have about 1 1/2 cups.

    Trim off the dark green feathery leaves and stalks of the fennel down to the rounded bulb. Cut a slice off the stem end with a vegetable peeler, trim away any brown spots or bruises. Cut the fennel length wise into quarters, then crosswise into thin slices.

    In a large heavy saucepan melt 1 tablespoon of the butter with the olive oil over medium -low heat. Add the green onions and cook until tender, about 3 minutes. Add the fennel and cook for 10 minutes, stirring occasionally.

    Raise the heat to medium high. Add the rice and cook stirring constantly for 1 to 2 minutes, until coated and shiny. Add about 1/2 cup of the broth. Cook, stirring constantly, until most of the liquid is absorbed. The spoon should leave a wide track on the bottom of the pan yet there should be liquid surrounding each grain.

    Continue adding the broth about 1/2 cup at a time, stirring after each addition. Adjust the heat, if necessary, so that the liquid simmers rapidly, but the rice does not stick to the bottom of the pan.

    After 15 minutes, stir in the fava beans. Add salt and pepper. Continue adding broth 1/2 cup at a time and stirring until the rice is tender yet firm to the bite and a creamy sauce forms around the rice and vegetables. Use only as much of the liquid as necessary. If you run out of broth, switch to hot water. Remove from heat.

    Vigourously stir in the remaining butter and cheese. Serve immediately.
    *Cooks note: I always add some of the broth at the very end if necessary to give the creamy consistency if the rice is too sticky.

    In the “Chez Panisse Vegetables” cookbook by Alice Waters, we found a nice selection of fava bean recipes including a purée, a soup and a dish with artichokes all are worth exploring.
    Related Tags: , , ,
  • Sunday, July 02, 2006

    Some Fish’n Favorites

    If you find our blog recipes to be without a theme, eclectic in nature, we promise you will find they all have one thing in common and that is great taste. Out of all the things that I attempt to prepare, I find fish and shellfish to be the most difficult. I love the taste of deep fried seafood, but have come to realize fish and shellfish deserve to have their delicate nuances of flavor preserved for the table. This challenge has lead me to try many varieties and preparations, from poaching and saucing to mousses. The two recipes represented here reward the chef in their ease of preparation and their delivery of comfort and flavor.

    adapted from the book titled “A taste of the Gulf Coast” by Jessie Tirsch
    Verona Watson’s Scallop Bake
  • 2 pounds bay or sea scallops (cut sea scallops into quarters)
  • 2 large egg yolks
  • 1/4 cup heavy cream
  • 2 tablespoons dry white wine
  • 2 teaspoons freshly squeezed lemon juice
  • 2 tablespoons minced onions
  • 1 1/2 teaspoons salt, divided
  • 1/4 teaspoon ground white pepper
  • 1/8 teaspoon ground ginger
  • 1/2 cup fresh breadcrumbs
  • 1/2 cup freshly grated Parmesan cheese, divided
  • 4 tablespoons unsalted butter, melted
  • 2 tablespoons chopped fresh parsley,
    preferably Italian ( flat-leaf )

    Preheat the oven to 450 degrees. Place 8 scallop shells or ramekins on a baking sheet and distribute the scallops evenly among them. In a bowl, beat the egg yolks and whisk in the cream, wine, lemon juice, onions, salt, pepper, and ginger. Divide among the scallop dishes. Combine the breadcrumbs, 6 tablespoons of the Parmesan, the melted butter, and parsley, and sprinkle this mixture evenly over the scallops. Sprinkle the remaining 2 tablespoons Parmesan over the tops and bake until brown and bubbly, 16 to 18 minutes.

    Cooks note: I replaced the white wine with a dry vermouth.


    adapted from the book titled “The Great Book of Seafood” Giuliana Bonomo
    Sailor’s Pie
  • 1 lb fillets of hake or cod
  • juice 1/2 lemon
  • 10 ounces floury potatoes
  • 1/2 cup mitk
  • 3 tbsp butter
  • 1 1/2 tbsp béchamel sauce
  • breadcrumbs
  • salt

    Wash the fish, drain, and poach for 10 minutes in 2 1/4 cups water with a little salt and the lemon juice. Leave to cool in the liquid and then drain. Remove any remaining bones, reduce to a purée in the food processor, and transfer to a bowl. Boil the potatoes in salted water for 30-40 minutes; drain, peel, and mash while hot. Work the potatoes into the fish, add the hot milk, the butter cut into small pieces, the bechamel sauce, and a little salt. When well blended, grease a deep cake pan (8-9 in in diameter) with butter, sprinkle the Inside with breadcrumbs and fill with the fish mixture. Top with a layer of breadcrumbs. Place in a preheated oven at 400 degrees for 10-15 minutes. Brown the top under the broiler for 2 minutes. Leave to stand for a minute before serving.

    Bechamél Sauce
    Make the bechamél sauce: put 1/2 pint milk into a small saucepan, add 1 peeled, sliced shallot (or small onion), 1 chopped carrot, 1/2 stick celery, chopped, 1 bay leaf, and a few peppercorns. Bring to a boil, remove from the heat, and leave to infuse for 15-20 minutes. Strain the milk and discard the flavorings. Melt 1 oz butter in a clean saucepan, stir in 4-5 tbsp all-purpose flour and cook the resulting roux for a few minutes. Gradually add the flavored milk and bring to a boil, stirring
    constantly. Cook for a further minute or two until thickened.

    Cooks notes: I used russet potatos.

    Related Tags: , , , , , , , , ,
  • Saturday, July 01, 2006

    “Holy Pasta!”and Shrimp

    Timpano del Cardinal Alberoni? Obviously a man with two loves, God and food. Checking the computers translator I found timpano to mean ear drum. Another source provided timpano as the late 19th century Italian spelling for drum, timpani drums, better known as kettle drums, usually played in an orchestra. So the cardinal must have had a well rounded belly and this dish may have been his favourite way to fill his drum. The man of god was not wrong, this is nice full flavoured pasta dish. Read through the recipe to wet your appetite. At the bottom are some thoughts of my own, cooks notes that may be helpful. I must confess we had this dish only hours ago and I have made it just once and thought it worth sharing.

    Timpano del Cardinal Alberoni
    Baked Macaroni with Shrimp

    This recipe is based on the one collected by Anna Del Conte in her book titled Gastronomy of Italy.
    serves 9

  • 3 cups very finely sliced mushrooms
  • 8 tbsp. butter
  • salt
  • 1 cup shelled shrimp
  • 2 tbsp. brandy
  • 1/2 cup freshly grated Parmesan cheese
  • béchamel sauce made with 11/2 cups milk, 2 tbsp. butter and 3 tbsp. flour, flavored with a pinch of nutmeg
  • freshly ground black pepper
  • 12 oz macaroni or penne

    Sauté the mushrooms in 1/4 cup of the butter for 5 minutes. Sprinkle with salt and set aside. Heat half of the remaining butter in a sauté pan, add the shrimp and gently fry for 2 minutes. Pour over the brandy, set alight and then add half the Parmesan. Keep warm. Make the béchamel in the usual way and then mix in the rest of the cheese. Preheat the oven to 400 degrees. Cook the pasta in plenty of boiling salted water. Drain when very al dente. Butter a deep ovenproof dish and cover the bottom with a layer of pasta. Spread a few tablespoons of the mushrooms and the shrimp over it and add some pepper. Repeat these layers ending with the pasta. Melt the remaining butter and when a beautifully nutty color, pour over the. Spread over the béchamel and bake for 20 minutes. Allow to stand for 5 minutes before serving.

    Cooks Notes: The shrimp used in the original recipe must have been on the small size to fit in a cup. I used medium shrimp and doubled the quantity, every one goes for the shrimp and it is nice to see them whole when on the plate.

    I will accept the fact you know how to make a béchamel sauce, here is how I enhanced it. Flavor your milk with one thinly slice carrot, one sliced shallot, a pinch of nutmeg, three or four peppercorns and the raw shells from half of the shrimp. Strain this before you add to the butter flour mixture.

    I used baby Portobello mushrooms pre-slice for connivence. I Think next time I might add a few dried Porcini but not many as they have a pronounced flavor.

    Save any juices that collect from the shrimp and the mushrooms you can add a bit to the dish as you layer it.

    Don’t try cutting back on the butter it is the correct amount. I did add more fresh nutmeg to the béchamel.

    Call me what you want, but I associate elbow macaroni with “mac and cheese” and find it heavy so I used Barilla brand “Pipettes” a lighter weight shell type pasta.

    Our liquor cabinet lacked brandy so I used Cognac with flaming results.


    Related Tags: , , , , ,
  • Friday, June 30, 2006

    Tomatillo Soup: Tangy and Fresh

    A seed catalogue first introduced us to tomatillos. We planted some in the back yard garden and ended up with an amazing crop of green and purple varieties. Beautiful to look at, wonderful to eat. The tomatillo is sometimes referred to as a husk tomato, once the husk is removed it looks like a small green tomato but has its own lemony–herbal flavour, The soup that we present here gives the tomatillo center stage. We make this soup whenever we find fresh looking tomatillos in the market. When buying make sure the husks are dry and the tomatillo firm. Tomatillos keep well and can be stored for close to a month in the refrigerator. Husk and wash the tomatillos then cook in a small amount of water over low heat in a covered sauce pan. Its flavour is revealed through cooking. You may have tasted tomatillos already in some green salsas, often called “Salsa Verde”.
    Cooks note; If you are short on time left over rotisserie chicken and canned chicken stock will still make a flavourful soup. For an unusual twist, smoke a chicken on the grill and you’ll have a soup that will make you famous!

    Chicken and Tomatillo Soup
  • 1- 3 pound chicken
  • salt and pepper
  • 1 tablespoons butter or olive oil
  • 1 medium sized onion, finely chopped
  • 3 garlic cloves, finely chopped
  • 1 pound fresh tomatillos, paper husk removed and washed
  • 2 ears of fresh corn
  • 1/2 roasted poblano pepper coarsely chopped *
  • 3 cups chicken stock
  • 2 tablespoons finely chopped cilantro leaves

    optional garnishes
  • sour cream
  • grated Monterey Jack or Queso Fresco cheese
  • yogurt.

    Put the chicken in a pot and add enough water to cover, at least 8 cups. You want to end up with a minimum of six cups of stock (I like to have extra to use for other recipes or to add to thin the soup). Sometimes I poach the chicken in chicken stock or part chicken stock part water for a richer broth. For the bouquet garni tie a couple springs of thyme, and a small bunch of parsley together. Add 1 quartered onion, 1 carrot chopped, 1 bay leaf, 5-6 black pepper corns and 1 celery rib chopped. Place the tied herbs of the bouquet garni under the chicken to make skimming the oil from the top easier. Bring the pot to a boil then reduce to a simmer for about 1 hour or until the meat is cooked through and loose. You will be using the meat for the soup so don’t poach it too long or it will loose its flavour. When the oil comes to the top skim it off. When the chicken is done, strain the broth through a cheese cloth or a fine mesh strainer. Reserve the broth. Cool the chicken and shred it into bite size chunks for the soup.

    Place the cleaned tomatillos in a saucepan in an inch or so of water and gently cook them until they are tender. Drain and run them through a food mill to remove skins and seeds. Reserve the pulp.

    Place 1 tablespoon of olive oil or butter in a stock pot large enough to hold the soup and sauté the onions until tender. Add to the onions the pureed tomatillos, chopped poblano peppers, corn kernels and chicken stock and simmer till heated through, add the shredded chicken. When the chicken is heated, season with salt and pepper, add more stock to thin soup according to your preference. Serve the soup and garnish with the cilantro and-or cheese, yogurt or sour cream.

    *Cooks note; I was fortunate to find roasted poblanos on a recent trip to Arizona. If they are not available you can roast your own. To roast the poblano peppers, Cut the pepper in half, seed and core then lay them flat on a baking sheet Place them under a broiler until they blister and turn black. When they are black put them in a covered bowl, they will continue to cook and soften. You may then remove the skins with no problem. They should not be mushy. If you have a gas stove, hold the peppers directly over the flame, rotate and roast until blistered. If poblanos are not an option use 1 or 2 raw jalapeño chiles chopped fine.

    Related Tags: ,
  • Thursday, June 29, 2006

    Sin is “Bacon Fried Chicken”

    Actually the name of this recipe is “Cap'n Charlie's Bits-of-Bacon Fried Chicken”, the sin is I can only make it when my wife leaves town. Personally I think she should be happy that this is as far as I plan to stray. My food sins include eating chicken skin, real mayo, truffled olive oil, crunchy bacon, hell yes to sausage and pork especially bar-b-q pork, why I can even include hot dogs. This not to say I don't try to eat a balanced diet with plenty of fish, fruit and greens and oh yes pie. Now about this “bits-o-bacon chicken”, this a double threat to most but for me it was such a treat I locked the door, cause I didn't want to share with the devil. You will see by the picture I didn't monkey around with a fancy side, just some crisp lettuce with “you guessed it” some bacony thousand island dressing (and a beer). The cap'n knows that some days the fish just won't bite!

    adapted from
    Cap'n Charlie's Bits-of-Bacon Fried Chicken
  • 2 chickens (2 1/2–3 pounds each), cut in small serving pieces with skin intact
  • 1 cup milk ( an overnight soak in buttermilk will give your chicken some tang and tenderize it too)
  • 1 egg
  • 1/2 cup all-purpose flour
  • 1 teaspoon salt
  • Generous sprinkling of freshly ground black pepper
  • Pinch of Cayenne
  • 1/2 pound slab lean bacon, minced.

    Prepare chicken pieces and set aside.
    Thoroughly beat milk with egg in a bowl or casserole dish large enough to hold chicken.
    Soak chicken in milk-egg mixture and refrigerate for 1 hour
    Mix flour, salt, black pepper, and Cayenne.
    Dredge chicken on all sides with flour mixture.
    Spread minced bacon pieces over the bottom of a large, heavy (cold) skillet.
    Do not cover skillet.
    Arrange chicken pieces on top of bacon in a single layer.
    Fry very slowly for 45–50 minutes,until chicken is tender.
    Turn carefully with tongs as chicken browns and bacon bits adhere to the pieces.
    Remove chicken from the skillet with tongs and dry on absorbent paper.
    Sprinkle any loose bacon pieces over chicken before serving.

    CHICKEN EVERY DAY. . . AND SUNDAY

    Cap'n Chicken is adapted from The Chesapeake Bay Fish and Fowl Cookbook and can be found at abebooks. The Chesapeake bay area is ripe with a culinary history and a wonderful place to vacation and sample many of the dishes found in this book.


    Related Tags: , , ,
  • Wednesday, June 28, 2006

    Lemon Soup with Zucchini for Summer

    This is a recipe I clipped from the newspaper some years ago and it is now archived in my black binders. Unfortunately I don't know who gets credit for the recipe, but I would still like to share it with some variations. Because the soup is assembled by the bowl, I increased the amount of zucchini and orzo allowing the eater to tailor the ratio of broth versus solids. Of course this soup is better if you make your own favorite chicken stock, bear in mind that the lemon flavor should be prominant once the eggs and lemon are combined. Keep your chicken stock flavor neutral.

    Lemon Soup with Zucchini
  • 2 quarts chicken stock
  • Coarse salt
  • 4 eggs * (I used five large eggs)
  • Juice of 2 lemons
  • 2 small zucchini, trimmed* (I used four young zucchini grated in a food processor)
  • 1/2 cup orzo (optional)
  • Olive oil
  • 1 lemon, thinly sliced, for garnish

    Bring the chicken stock to a boil in a large saucepan. Add salt to taste. Meanwhile, beat the eggs in a medium bowl with a whisk or electric mixer until thick and frothy. Slowly add the lemon juice,beating constantly. Slowly add 2 cups of the hot broth, still beating constantly to prevent the eggs from curdling. Stir the egg-lemon mixture into the remainder of the hot chicken broth. Let cool and refrigerate. Either grate the zucchini in a food processor or cut into julienne strips (I trimmed the zucchini but didn't peel them). Blanch in boiling salted water for 45 seconds just to set the color and remove raw taste. Quickly drain zucchini and run under cold water until cool to the touch. Refrigerate the orzo, if using, in a large pot of boiling salted water until al dente, about 10 minutes. Drain and run under cold water until cool. Drain and set aside. (If making orzo more than 1/2 hour ahead of time, toss with 1 teaspoon olive oil to prevent sticking and refrigerate until needed.) To serve, mix zucchini and orzo with the soup. Serve chilled. Garnish with lemon slices, if desired Makes 7 servings.
    Cooks note: The first day we ate the soup warm, it was delicious. It is much like the Greek avgolemono soup that is made with eggs, lemon, chicken stock and rice. The second day we ate the soup cold and decided it needed to be room temperature to retain its flavor better. The sliced lemons used as a garnish helped pep up the lemon flavor.
    Related Tags: , ,
  • Wednesday, June 14, 2006

    Nineteen New Images in the Gallery!

    You will see by the additions to the gallery how the animated world of food is growing. There seems to be a trend to garner our attention by reflecting human qualities in the food we purchase. The cheese head characters on the Sorrento and Frigo packages are the worst of the genre, representing youthful sportive characters enticing us to gobble down large packages of rubbery cheese. The winning entry is the bucket and the butter; romance with the cinema. Check out captain cupcake and all his friends in our Anthropomorphic Food and Kitchen Gallery. Don't forget to click on the images to enlarge them.

    Threadless t-shirts has a great submission depicting a cute bread character being made into french toast. First you see the happy slice with egg friends smiling. Second the slice gets drenched, its happy face now contorted, Its egg friends cracked. Finally the sad ending, dead bread in the fry pan. It might sound tragic but the drawings are done with such a degree of cuteness you smile at the bread's pain. Click on this banner to see...
    Bon Appetit - Threadless, Best T-shirts Ever

    Dollar short and friends reveal interesting psychological aspects of food anthrpomorphising in the blog entry “Eat me”.
    “Ever since I was a child, I have viewed my food as little warriors and little friends. Eating cheerios was always a daunting task. There could never be a left-over "O" — not just because of my desire not to waste, but also because I didn't want it to feel left out.”

    Saturday, June 10, 2006

    Destination Food: Cafe Poca Cosa

    “The fish tacos above looked delicious although I did not taste them. Two of us ordered the plato Poca Cosa and each had a slightly different variation of tamale pie, beef and chicken, yumm.”


    Destination food is an ongoing post describing outstanding locations where we have eaten in various parts of the country and the world. We have been known to plan destination points around foods we want to experience while on vacation. I found one such place while visiting Tucson, Arizona last week. The restaurant is called “Cafe Poca Cosa” which means little things in Spanish. I decided the sample platter would allow me a one visit “across the board” assessment of the restaurant. My conclusion was a complete and total revaluation of my preconceptions of Mexican food. The freshness of the ingredients and the creative blending of flavours elevated the meal beyond my exceptions. Dieter and I have realised the best restaurants have a creative chef, (usually an owner) that understands how to create a menu that show cases their love and skill in the kitchen. I cannot fully express our disgust of the formula based kitchens where kitchen help are trained in the finer points of microwave and can opener operation. Conversely a resident chef-owner cares about the quality of each plate going out of the kitchen. At Cafe Poca Cosa this passion about what gets served is obvious. I love this restaurant because the menu changes twice a day from breakfast to dinner and each day is different. According to the splendid table public radio audio review the Cafe Poca Cosa, kitchen is a constant parade of local farmers bringing in seasonal produce determining what dishes are written on the chalk board menu of the day. There is no printed menu. What could be better?

    I was told the chef/owner Suzana Dávila is of Mexican decent and returns to Mexico for inspiration. I am telling you, this was Mexican food unlike anything I have ever eaten. I was so inspired when I came home I bought two new Mexican cookbooks hoping to make Mexican food to dream about. So far I can only dream of eating great food at Cafe Poca Cosa.

    They have a new location:
    Cafe Poca Cosa
    110 E. Pennington
    Tucson, Arizona 85701
    520.622.6400

    Related Tags:

    Sunday, June 04, 2006

    Mochi: Soft and Sweet Just Like You

    My friend Alan showed me how to make this mochi while I was visiting in Arizona. This is a quick baked version he found while living in Hawaii. The original mochi is a Japanese recipe which apparently is labour intensive. I had bought mochi before from our local Asian grocery in Sarasota, it was good, but not as good as Alan’s. He told me the coconut milk must be the high fat version if you are going to bother to make this, low fat milk does not impart the rich flavour. Watch out, the subtle sweet taste and smooth sticky texture are addictive. I found myself gravitating over to the mochi bowl for mid morning and afternoon snacks. He said in Hawaii you would find a pyramid of mochi, each piece wrapped carefully in wax paper for Christmas or special occasions. We cut the mochi into rectangles, but Alan and I discussed the possibility of making shapes with cookie cutters. Whenever you eat this mochi, you are guaranteed a special occasion.

    Before cutting the mochi out of the pan trim the dry edges off. These can be put aside and eaten, but they don't look as special as the rest of the pieces.

    Mochi
  • 1 pound mochi flour
  • 2 1/2 cups sugar
  • 1 tsp baking powder
  • 1 can coconut milk (12 oz)
  • 1 3/4 cups water
  • 1 teaspoons vanilla extract
  • 3 drops red food colouring
  • potato starch

    Mix the dry ingredients thoroughly.
    Combine the coconut milk, water and vanilla extract in another bowl. Slowly add to dry ingredients and mix till smooth. Add food colouring and stir.

    Pour into a well greased 9x13 inch baking pan. Cover tightly with aluminium foil and bake in a preheated oven 350 degrees exactly one hour. Remove from the oven and remove foil. Let it cool then cut into strips and peel up from the pan then cut the strips into smaller pieces. Before cutting roll the strips in the potato starch to keep the mochi from sticking together.

    This does not need refrigeration and can be stored in an airtight container. It won't last very long. Believe me.

    Related Tags: ,
  • Friday, May 19, 2006

    The Day after the Day after “This Day is Without Food Blogs”

    We are a little behind, but what else is new. On May 16 foodbloggers who support internet democracy posted statements, links to further information and petitions in support of internet democracy. We support web neutrality and encourage anyone interested to read more about this issue at save the internet. I was made aware of the issue while browsing Chez Pim.

    Sunday, May 14, 2006

    The Second Helping House Guests


    Our friends and neighbors Ray and Terrie are on a lifetime adventure. They along with the “girls” Sophia and Hannah (nice dogs) drove from Florida to Oregon pulling their 1965 vintage air stream trailer where they are living as campground hosts in Oregon for the summer. We were curious about what they were eating and asked them to send us a guest entry for the blog on campfire cooking. When I saw what they were making I thought back to my days camping as a girl scout and making campfire stew out of cans of campbell vegetable soup and hamburger a far cry from planked Alaskan wild cod fillet.

    Morning from Oregon,
    Here are some photos and text for you...see if you are interested for your blog...we decided not to start with the dungeness crab Ray had at Lighthouse because that was a crab patty...even though a fresh made one...we will comment when we have some unadulterated crabmeat...hope all is well with you guys...was 39 degrees when I got up this morning...I see it is going to be 88 today for you guys...we are enjoying the very different weather...today we are going to a festival at the Thyme Garden Herb Company up the road...music and May wine and herb dishes...hopefully, there will be interesting photos and food/drink news to pass on to you...I don't know how to do attachments to e-mail...so I am copying these photos to this e-mail...let me know how they come out...We are surrounded by Alder trees here at our Oregon camp.....Ray split a piece of the Alder wood to make a plank for grilling...this is Alaskan Wild Cod fillet sprinkled with lemon pepper and topped with fresh lemon slices and red pepper...spring onions on the side...and on the right is a boneless pork chop about 2 inches thick...it was marinated in raspberry and roasted chipotle sauce and pressed garlic...both cooked close to an hour...slowly over a campfire...both were excellent...


    We threw washed and wrapped in foil yams on the fire and cooked them until soft...add butter when cooked and served...The wine is a cabernet...the steamed green cabbage and sweet onion is a left over half a head of cabbage steamed on my electric hotplate topped with butter or sweet chile sauce when serving...the left side dish is a...


    fantastic stewed white corn
    these ears of corn here...I don't know where they were grown but they were the largest ears of white corn I have ever seen...
    4 ears for a dinner for 2
  • shuck, wash and grate the corn into your skillet
  • add over low heat 1/2 to 3/4 cup of milk
  • 2 TBS of butter...
  • salt and pepper to taste...
    cook slowly for about 20 to 30 minutes...frequently stirring...this is a wonderful way to use fresh corn...there is nothing to compare with cooking outside here in Oregon in the crisp air over a fragrant open fire of wood spilt by your husband...with the dog children running and playing around while you cook...it was good...Love from, Your Oregon Campground Hosts, Terrie and Ray

    If you want to read more about the idyllic life of camp hosting in a breathtaking landscape check out Ray and Terrie's blog at land yacht safari.
    Related Tags: , ,
  • Thursday, May 11, 2006

    What Rhymes with Food?

    Here at the second helping house we don't fight over pie.

    My wife and I have been searching for an illustration of the “dish running away with the spoon”, depicted in the Mother Goose rhyme “The cat and the fiddle”. We have an anthropomorphic gallery as part of this blog, and would like to include this image. My search lead to my mothers collection of children's books, many saved from my childhood, she uses them as a soure of inspiration for her own art work. Still sharp at 83 she pulled her favourite “Mother Goose” from the book case. It was the one I remembered but not with the illustration that I imagined. Paging my way through the volume I was struck by the number of rhymes that made mention of food. The illustrations flooded my mind as I remembered them from long ago. This moment of impact –the collision of childhood memory and my current re-examination of this book led me to an immediate conclusion. It would be a great shame not share and enlighten everyone to this forgotten illustrator. His name is “Tenggren” and the illustrations are from “The Tenggren Mother Goose”. This book is out of print but he also illustrated many of the children's “Little Golden Book” series. A search at abebooks will turn up many of Tenggren illustrated works. In my research I discovered May the first is mother goose day, a day to read and remember our mother of rhyme.

    If you grew up as lucky as I did with a mom who bought books for you and read them outloud as you studied the pictures you may have a spot in your heart for “Mother Goose.”


    Related Tags: , , , , ,

    Sunday, May 07, 2006

    The “Corn Phoenix” Rises

    Long before food blogging I was in the habit of trimming recipes from the news paper. This interest in recipe collection started when I car pooled to work with a guy who had little to say, so I read the paper. I saved the recipes thinking they would expand my limited culinary repertoire. Little did I know that collecting the little squares of paper would become a passion, I still have them archived neatly arranged in black binders. At the time I lived a bohemian life style with minimal needs in sunny Florida right across the street from the beach. Bradenton Beach was my Shangri-La. One hot summer night the sirens woke me and I stepped out to see a house on fire two doors down on the Gulf of Mexico side of the street, beach front property. I grabbed my camera and headed for the blaze hoping for a prize winning shot. No winning photo but a week or so after the fire I went out to the street to get my mail from the box and this recipe was at my feet. As I examined my find I thought this is surely an object of beauty. Images of Nazi Germany filled my head, news reel footage of the flames of war, the hysteria of public book burnings. Again as a beautiful fragment, only this time a Byzantine manuscript salvaged when Caesar burned the Royal Library of Alexandria. This book page born aloft by the fingers of flame has been with me now for eleven years, a reminder of balmy summer nights by the sea. And so with the assistance of the internet I share with you the Phoenix, this delicious dish returns from the ashes with the addition of some fresh nutmeg grated over it. By the way the book can still be purchased. It is called “Great Food Without Fuss” by Frances McCullough and Barbara Witt.

    Early Summer Fresh Corn Pudding
  • 6 ears tender fresh corn
  • 3 eggs, beaten
  • 1 cup heavy cream
  • 1/3 cup milk
  • 1 teaspoon salt
  • 1 tablespoon sugar

    Preheat the oven to 350 degrees. Cut the corn from the cob and scrape the cob well to extract the milk. You should have 2 cups of corn.

    In a large bowl, mix the eggs, cream, and milk. Add the salt, sugar, and corn.

    Pour the mixture into a buttered shallow casserole or heatproof glass dish. Place in a shallow pan of warm water and bake until a knife inserted in the center comes out clean, about one hour.

    Cooks note: For me the story of the burnt page is more important then the corn pudding recipe on it Although this is a good recipe it is quite common with many variations. For example this recipe can be made into a main course with the additions of either chicken, or oysters. A variety of herbs and spices can be added, basil and nutmeg being my favorites, not necessarily together. Other welcome additions are onions, scallions, red or green bell pepper or turn up the heat with any number of hot chillies. This is a dish that will make you famous at any pot luck affair.
    Related Tags: , , ,
  • Sunday, April 30, 2006

    Not Quite Apple

    This mystery pie was baked to take to a neighbours pre parade party. Without revealing the filling, we asked everyone who tasted to identify the fruit. The responses went like this. “Not quite apple, mango, peach, star fruit, guava?” No. Then there was one guy who upon close scrutiny identified the tomatoes by the colour, texture and seeds then went on to deny his conclusion, “ but its not a tomato pie.” And so it went with every guest who tasted it. This is the way Susan Purdy introduced the recipe, as she was put to the test the first time she tasted a green tomato pie.

    adapted from “As Easy as Pie” by Susan G. Purdy.
    Advance preparation: The pastry can be prepared ahead and frozen. Complete unbaked pies can also be frozen, though the texture is best when freshly baked.

    Special equipment: 9 inch pie plate; pastry brush; large saucepan; colander; aluminium foil strips or frame
    Baking time: 425 degrees for 20 minutes; 375 degrees
    for 35 to 40 minutes.
    Quantity: One 9 inch pie.
    Unbaked pastry for 2-crust, 9-inch pie made with Basic All-Purpose Flaky Pastry or Cheddar Cheese Pastry Variation or Whole Wheat Pastry


    Peeling the tomatoes is easy to do. Cooks note: I made an “x” on the bottom of each tomato before plunging it into the boiling water for one minute or a little longer. No ice bath necessary. Rest in a colander for a few minutes, core and peel. Some of my tomatoes were a blush color instead of green, but it did not seem to effect the flavour of the pie.


    Green Tomato Pie
  • Egg glaze: 1 egg beaten with 1 tablespoon water
  • 3 tablespoons crushed corn flakes or Rice Krispies cereal
  • 4 cups peeled, sliced green tomatoes,
    (5 to 6 medium-large tomatoes)
  • 1 cup light brown sugar, packed
  • Juice and grated zest of I lemon
  • 1/2 teaspoon each cinnamon and nutmeg
  • 5 tablespoon flour plus I tablespoon quick-cooking tapioca

    1) Prepare your favourite pie pastry as directed. Note: when you choose a pie pastry I would not advise one that adds sugar as the crust browns very quickly with this pie baking technique. Roll out half of it, and line the pie plate. Refrigerate the remaining dough. Trim a 1/2 inch overhang on pie plate. Brush the lower crust with moisture-proofing egg glaze and sprinkle with cereal crumbs. Chill the pastry-lined pan in the refrigerator while preparing the filling.
    2) To peel the tomatoes, bring a large pot of water to a boil. Cut a cross shaped slit in the skin at the bottom of each tomato. Immerse the tomatoes in the boiling water 2 to 3 minutes. Drain in a colander, then cut around the stem ends and peel the skin. Quarter the tomatoes, then cut them in 3/8 inch thick slices and drain them thoroughly in a colander. Put the slices in a bowl.
    Preheat the oven to 425 degrees
    3) Add to the tomatoes the sugar, grated zest and juice of lemon, the spices, flour and tapioca. Stir gently. Note that while tomatoes vary greatly, they all contain a lot of water. For this reason, sufficient thickener must be used or the pie will
    be too runny.
    4) Fill the pastry with the prepared tomato mixture. Brush egg glaze around the rim of the lower crust. Roll out the top crust and fit it over the fruit. Trim a 3/4 inch overhang. Fold the top edge under the bottom crust overhang and pinch together to seal, making a raised rim all around. Flute the edge as desired. Cut vent holes in the top. Brush egg glaze over the pie top and sprinkle lightly with a little granulated sugar.
    5) Set the pie in the lower third of the preheated oven and
    bake 20 minutes.
    Reduce the heat to 375 degrees, raise the pie to the centre
    of the oven, and bake an additional 35 to 40 minutes or until the pastry is golden brown. Check the pie after half the baking time and add a foil edging if necessary to protect the crust from over browning. Cool on a wire rack. Serve warm or at room temperature.
    Related Tags: , ,
  • Thursday, April 20, 2006

    Yellow Tomato Soup

    Have you ordered your garden seeds yet? If flowers are for the heart, tomatoes should be for the soul, your garden should have both. Tomatoes require so little from the gardener and for a small effort, you will be blessed with a bounty of fruit. In most cases once you start picking, sharing becomes a requirement, your neighbors will love you. If you need more convincing, just think back a few months to the taste and price of a store bought tomato, how horrible. So now order your seeds, prepare your ground and allow room for at least one yellow tomato plant. The joy of nurturing a garden is a good thing not to mention the delicious results in the kitchen. Pause just for a minute and feast your eyes. on this yellow tomato soup. Of course you can make it red as well.adapted from The Good Cook Techniques & Recipes
    Soups
    Adapted from the editors of Time-Life books

    Italian Tomato Soup
    Minestra di Pomidoro
    To make crostini, saturate slices of bread with melted butter, spread them thickly with grated Parmesan and cook them in
    a moderate oven for 10 minutes. An anchovy fillet may be placed on each slice. Cooks Note: we normally don't use butter when making crostini, but use olive oil instead. Slice crusty Italian bread into rounds and place in the oven under the broiler till slightly brown about 2 minutes. Take the slices out turn them over and toast the other side. Then rub the toast with a garlic clove and drizzle or brush with olive oil.
    To serve 4
  • 1 1/2 Ib. tomatoes, peeled and chopped 3/4 kg.
  • 1/3 cup olive oil 75 ml.
  • 1 garlic clove, crushed 1
  • 1 tbsp. chopped fresh parsley, basil or rnarjoram15 ml.
  • 2 1/2 cups meat or chicken stock 625 ml.
  • salt and pepper
  • sugar
  • crostini (optional)
    Melt the tomatoes in the olive oil; add the garlic and the parsley or basil or marjoram. Cook for 5 minutes, then add the stock, salt and pepper, and a pinch of sugar. Cook for 5 minutes more only. By this method the flavor of the tomatoes is retained and the soup tastes very fresh. In the summer this soup can be eaten iced, accompanied by hot crostini of cheese and anchovy.
    Cooks note: Concerning the melting of the tomatoes.
    I agree that the tomatoes should not be over cooked, but I like the sweetness created by cooking off some of the liquid rather than adding sugar. To maintain a fresh tomato taste, I add a half a dozen medium tomatoes right at the end. Cook for five minutes, then run the whole works through a food mill to rid it of skin and seeds. I especially like the taste of fresh marjoram in this tomato soup but any bright flavoured herb or a blend of herbs will work just fine.

    Optional garnish of roasted red cherry tomatoes
    and sour cream.
    Related Tags: ,
  • Tuesday, April 18, 2006

    The Glory and the Gory

    Easter Sunday was spent mostly in the kitchen preparing foods for the grand Easter buffet at “Shirley mom's” house. This recipe is one I rescued that morning from an old New York Times headed for the trash. Incredibly I had all the ingredients on hand to make it for the Easter dinner. This is a relatively easy cake that is rich and satisfying. Oh, and about the peep, don't feel bad that was a stale peep saved from last year. As we lingered around the table my niece, Lauren who is an extremely talented jewery and accessory designer could not contain her busy fingers for one more moment. The peep's demise is actually a performance piece made with strawberry sauce. No one need cry.
    Adapted from the New York Times Magazine article titled "The Way We Eat" March 5, 2006

    Lemon-Frosted Pistachio Cake
    For the cake:
  • 8 ounces butter
  • 1 cup plus 1 tablespoon superfine sugar
  • 3 large eggs
  • 1 cup finely ground unsalted pistachios
  • 1 cup finely ground blanched almonds
  • Juice and finely grated zest of 1 orange
  • 1 teasoon rosewater
  • 1/2 cup plus 1 tablespoon all-purpose flour

    For the icing:
  • 1 cup confectioners' sugar
  • 2 tablespoons lemon juice
  • crystallized rose petals and shelled pistachios, for garnish (optional).
    1) Preheat oven to 350 degrees. Line the bottom of an 8-inch nonstick cake pan with parchment paper.
    2) In a mixer fitted with a paddle, cream together the butter and superfine sugar until light and fluffy. Add the eggs one at a time, then add the ground pistachios and almonds. Add the orange juice, orange zest and rosewater, and mix well. Using a
    rubber spatula, fold in the flour; do not overmix.
    3) Scoop the mixture into the cake pan, and bake until the top is firm and a light golden brown, about 40 minutes. Lightly cover the top of the cake with foil and continue baking until a toothpick inserted into the center comes out dry, about 10 minutes. Allow the cake to cool in the pan for several minutes, then remove and cool on a rack.
    4) When the cake is cool, make the icing: mix the confectioners' sugar and lemon juice together in a small bowl, and pour over the cake. If desired, decorate with crystallized rose petals and pistachios. Allow the icing to set for 30 minutes before serving.
    Serves 12. Adapted from "The Kitchen Diaries," by Nigel Slater.
    Cooks notes: Instead of using the rosewater I used one teaspoon of vanilla extract (the rosewater reminds me of the perfume worn by old ladies in church) I also replaced this icing with a seven minute boiled lemon icing based on a Fanny Farmer recipe. The cake improved with age and could be made one day ahead of time. If making a day ahead I would wait to ice and decorate before serving. Fresh pansies from our garden were used in place of the crystalized rose petals. If you are really energetic I believe pansies can also be crystalized. We did not eat the fresh pansies. Keep your eye on the baking cake! My cake was well done in 35 minutes, his recipe bakes for a total of 50 minutes.
    Related Tags: , , , ,
  • Friday, April 14, 2006

    Easter Wishes

    in 2003 we heard about these controversial easter baskets that were being pulled off the shelves of stores in Florida. Of course I ran immediately to the local Wall Mart which I rarely set foot in. Here I found rows of Easter baskets whose chocolate bunnies and peeps had been taken over by buff super action soldiers complete with automatic weapons and explosives. Protests were happening around the nation against the ideas of war and religion being tossed together in a cute little baskets of m&m’s and skittles. A woman in new york “miss bunny” who dressed in a bunny outfit and held a sign reading “there’s someone in my Easter basket... and its GI Joe was arrested by police. After a bit of public outcry these baskets were taken off the shelves of big chain stores. Protesting in this case resulted in the action of big corporations to comply with the wishes of their customers. We wish the soldiers could be pulled from iraq as quickly as these baskets were taken off the shelves of big chain stores like Wall mart and K-mart.
    Related Tags: , , ,

    Saturday, April 01, 2006

    A Tomato Tradition

    There is something to be said about personal traditions. I am not speaking of the mandatory traditions, associates of the big calendar holidays, Christmas, Hanukkah, Halloween, Easter and so forth. Although I do believe it is ok to endorse any tradition if it brings you happiness. A tradition that develops in you own home or community for what ever reason enriches the day. I pose this question by way of example to explain my thoughts. “What becomes more memorable, the yearly Thanksgiving dinner or your uncles one speciality; the "Pepto- Bismol” coloured cranberry condiment?” Hence you have a tradition to look forward to and speak of later.

    Food perhaps has the richest traditions of all traditions, in part it defines a culture. The seasons preside over food traditions; the planting and harvest are the king and queen of festivities. March in Florida means my tomato vines are yielding in abundance. Having a small yard, my garden is limited to containers, I usually grow three to four pots with different varieties and one pot is always a cherry tomato (sweet 100’s my preference). If you are an experienced tomato grower you understand the dilemma of having a kitchen full of ripe tomatoes. Hence our spring tradition of tomato cobbler, our favourite cherry tomato recipe.

    Mixed Tomato Cobbler With Gruyere Crust
    Serves 8
    Adapted From Martha Stewart Living March 2000
    Resist temptation and allow the cobbler to cool to room temperature before serving so tomato juices have time to collect.


  • 2 3/4 cups plus 2 tablespoons all-purpose flour
  • 2 1/2 teaspoons salt
  • 2 1/2 teaspoons granulated sugar
  • 1 1/4 cups grated gruyere cheese
  • 1 cup ( 2 sticks ) plus 1 tablespoon unsalted butter, cold, cut
    Into pieces
  • 1 large onion diced
  • 3 cloves garlic, minced
  • 2 pounds assorted cherry tomatoes
  • 1/2 cup chopped basil
  • Pinch of fresh ground black pepper
  • 1 large egg
    1) In the bowl of a food processor, combine 2 1/2 cups flour, 1 teaspoon salt, 1 teaspoon granulated sugar, and 1 cup cheese. Add 1 cup butter; process until mixture resembles coarse meal, 8 to 10 seconds.
    2) With machine running, pour ice water ( about 1/4 cup ) little by little through feed tube. Pulse until dough holds together without becoming wet or sticky; be careful not to process more than 30 seconds. To test squeeze a small amount together; if it is crumbly, add more ice water, 1 tablespoon at a time.
    3) Divide dough into two equal balls. Flatten each into a disk; wrap in plastic. Transfer to refrigerator; chill 1 hour or overnight.
    4) Melt remaining tablespoon butter in a large skillet over medium heat. Add onion and garlic. Cook stirring occasionally, until translucent and softened, 5 to 7 minutes. Transfer to a bowl to cool slightly.
    5) Place tomatoes in a large bowl toss with the remaining 1/4 cup plus 2 tablespoons flour, 1 1/2 teaspoons salt, 1 1/2 teaspoons granulated sugar, and the basil and pepper . When the onion mixture is cooled, add to the tomato mixture and toss to combine. Transfer mixture to a deep 9 1/2- or 10-inch pie dish. Set aside.
    6) Heat oven to 375 degrees. Roll out half the dough into a circle 1 inch larger than the pie dish. Remaining dough may be frozen up to 1 month. Transfer rolled dough to top of dish; tuck in edges to seal make 3 to 4 small slits in crust; form a decorative edge if desired. In a small bowl, mix egg with 1 teaspoon water brush egg glaze over crust; sprinkle crust with remaining 1/4 cup cheese. Place pie dish on baking sheet to catch drips; bake until crust is golden and insides are bubbling, about 50 minutes. Let cobbler cool before serving. Note I like this pie best when it is still warm, makes a great side dish.

    Additional notes for recipe:
    If tomatoes are extremely juicy add more flour.
    If the tomatoes don’t seem sweet add a bit more sugar.
    Short on basil, us a combination of parsley, thyme and oregano.
    A low casserole dish works better than a pie pan to contain the bubbling juices.


    As a reminder; If you live in the northern climes now is the time to buy your tomato seeds, I like the vast offerings of “Totally Tomatoes”.
    Related Tags: , , , , , , , ,
  •